Swapcard Go Setup Instructions
Check-in and Badge Printing using SwapAccess
This guide provides the steps for setting up Swapcard Go's onsite hardware and software for check-in and badge printing, including documentation and videos for self-service setup.
.webp)
Receiving Equipment
Before the event, you'll agree on an equipment list and shipping details. Upon receiving your equipment, inventory the items using the included inventory list in the red folder. Contact your support person immediately if there are any discrepancies.

Tip: Take photos of the cases when you first open them to aid in repacking after the event.
Setting Up the Network
You will receive a wireless router as part of your equipment. Ensure you have a wired Internet connection at the registration area. Network switches and Ethernet cables may be provided depending on your equipment order.
Refer to the basic network setup diagram and video link below:
Onsite Registration Network
.webp)
Internet Connection: Connect the venue's wired Internet connection to the WAN port on the router.
Printer Connection: Connect Zebra printers to the router's LAN port using Ethernet cables. Use a network switch if additional ports are needed.
iPad Setup: Install iPads into desk or floor stands as ordered. Connect them to the wireless network provided by the router. The network name and password will be included in the shipment or on the router itself.
For more help, watch the network setup video below.
Network Setup
Configure the Printer and Load the Badge Stock
Connect Cables: Connect the power and Ethernet cables to each printer.
Power On and Load Stock: Turn on the printer and load the badge stock. Watch the Badge Stock Loading Video below for detailed instructions.
Zebra Printer Load Badge Stock
Note: If the printer cuts the badge stock incorrectly, or ejects a blank badge after printing, you may need to recalibrate the printer. In that case, watch the Printer Calibration Video below for instructions.
Printer Calibration
Note: If the printer still cuts the badge stock incorrectly, follow the directions in the Adjusting the Printer Cutter Video below.
Adjusting the Printer Cutter [Video]
SwapAccess Setup
SwapAccess is the mobile app for check-in and badge printing on Apple iPads and iPhones. You can download it from the Apple App Store. Watch the video below to configure SwapAccess on a self check-in iPad device.
SwapAccess Overview and Configuration
Learn how to generate a configuration QR code for SwapAccess for your event by watching the video below.
Create SwapAccess QR Code
Admin Printing from Swapcard Studio
If you received iPhones with your order or plan to use your own, follow the same instructions as above to install and configure SwapAccess, which you can download from the Apple App Store.
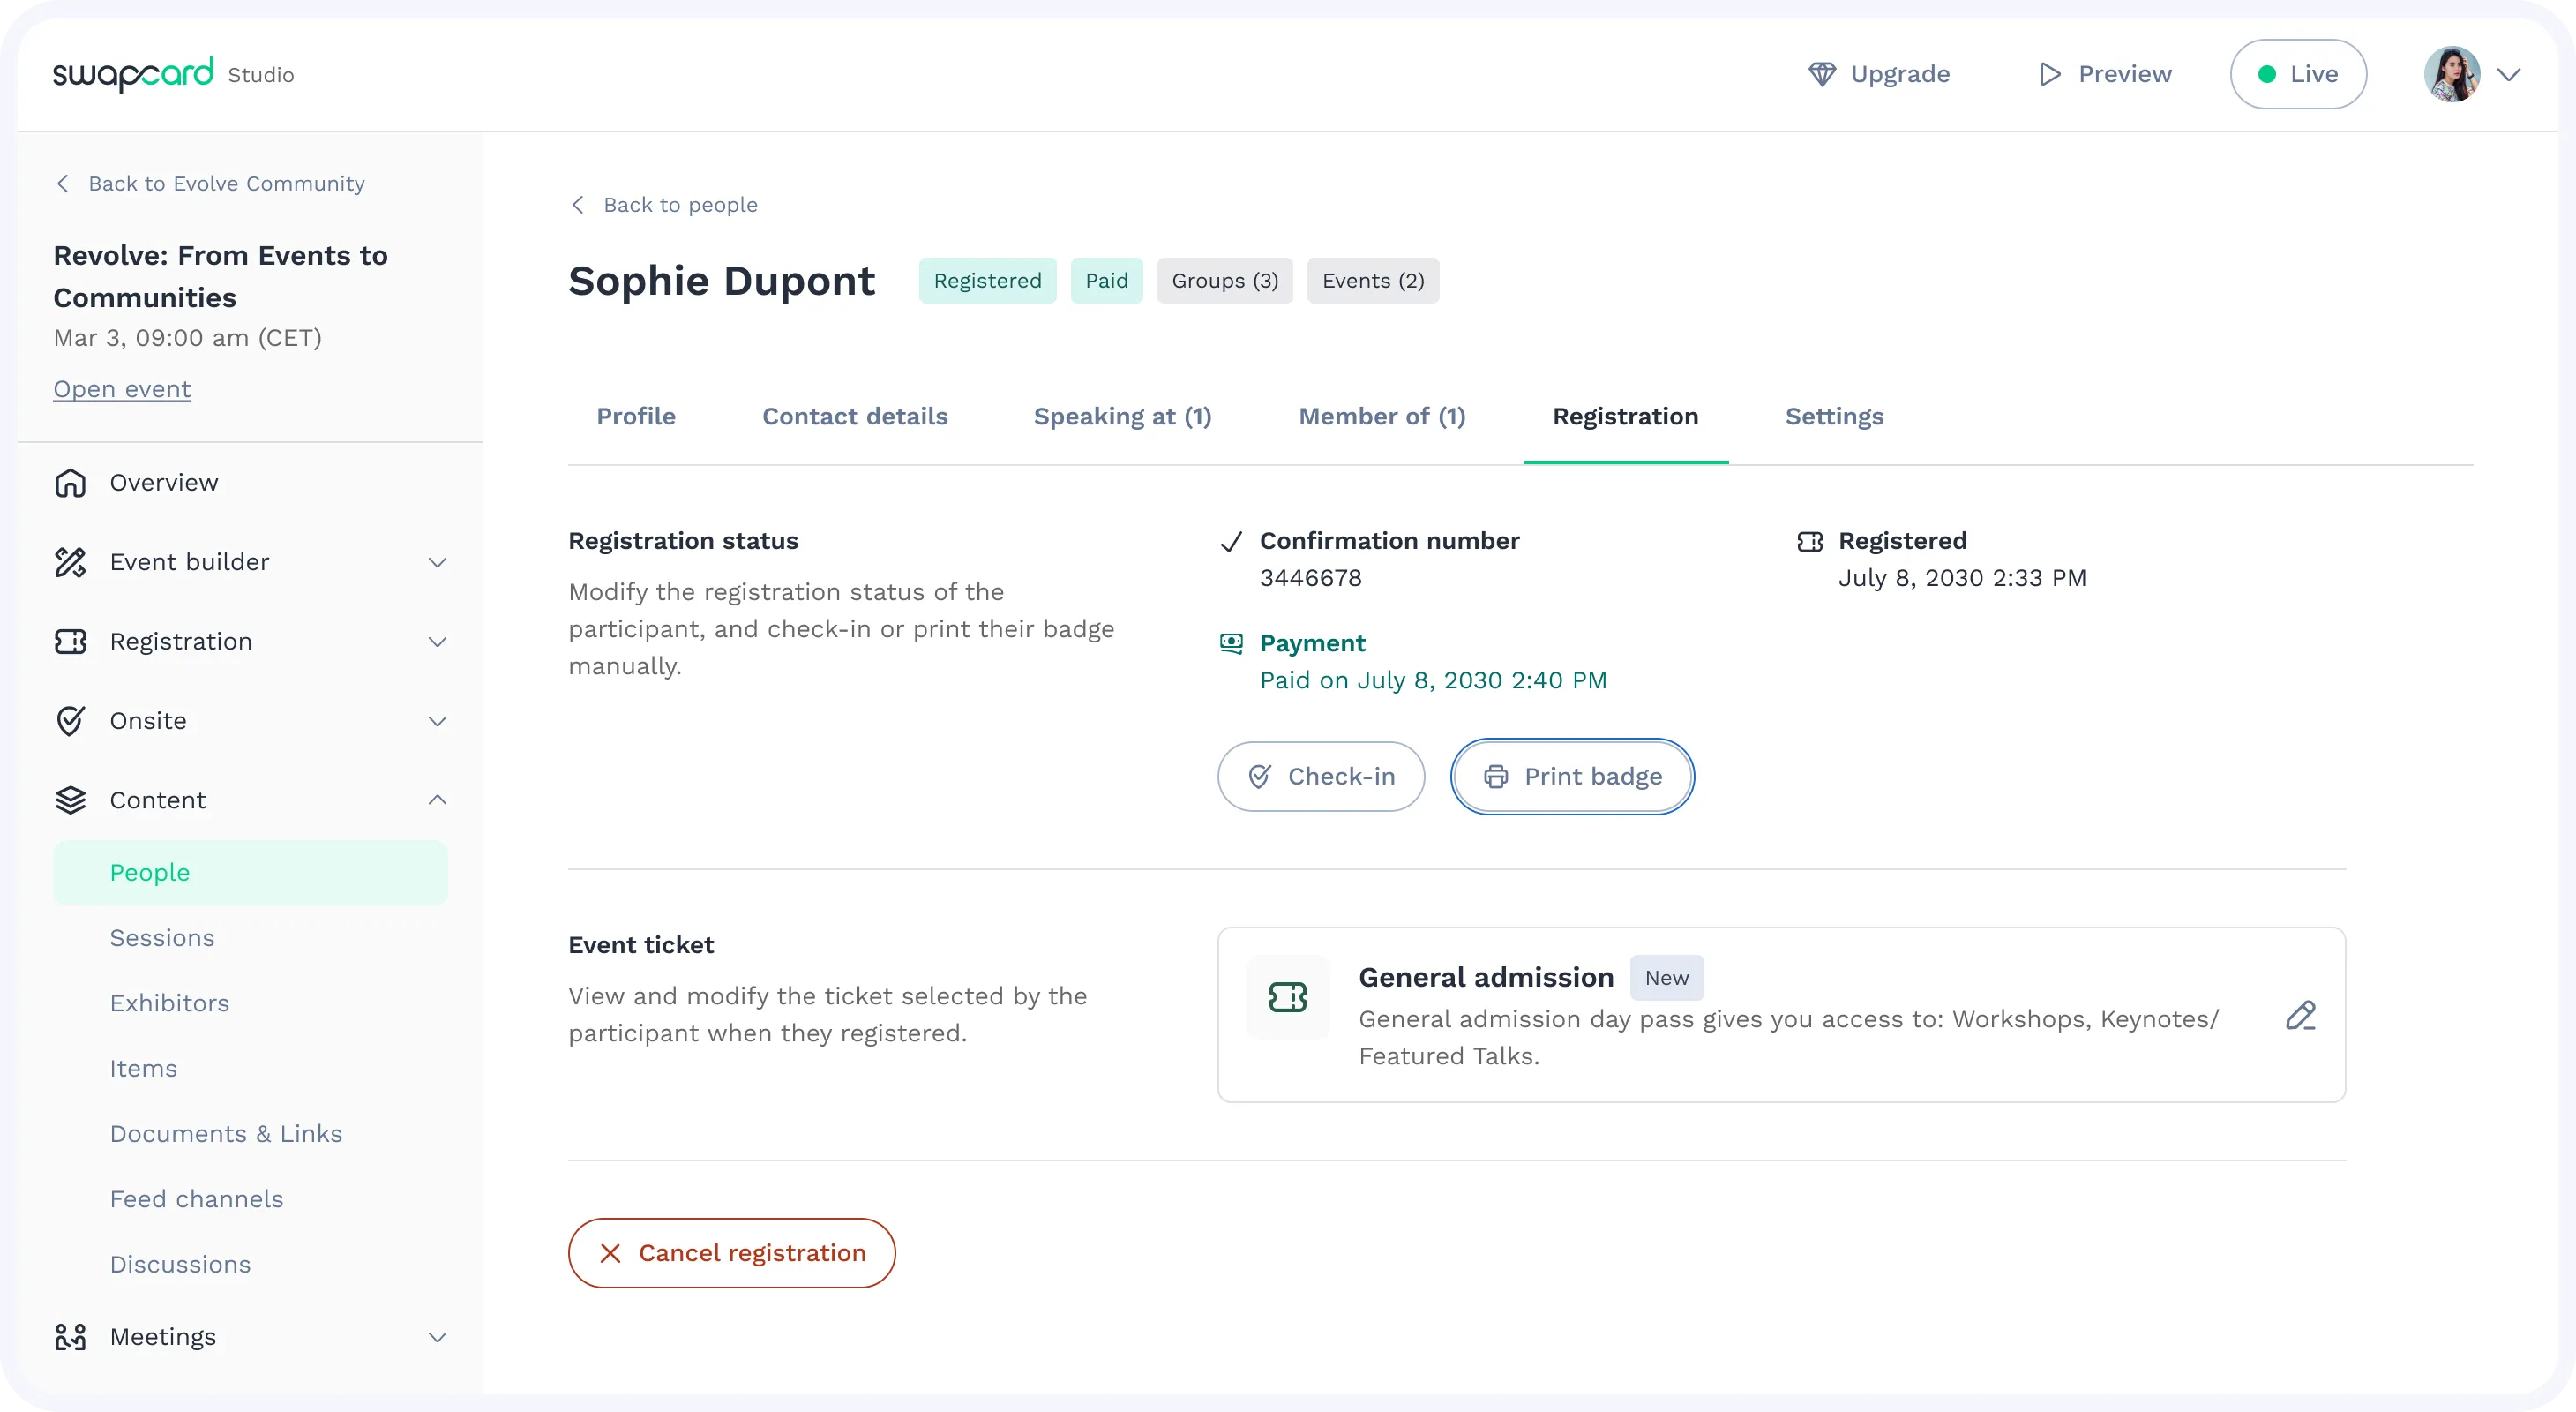
Reminder: The system won't print a badge for someone already checked in. To reprint, uncheck them in Studio and scan their QR code to check them in again.
Alternatively, connect a printer to your computer via USB or network, generate a PDF in Swapcard Studio, and print the badge.
Packing Out
After the event, pack all equipment into the provided cases. Use the FedEx return labels found in the folder from the shipment. Drop off the cases at the nearest FedEx location the day after the event ends.

.svg)


.svg)
.svg)
.svg)
.svg)
.svg)


